This tutorial is about creating a Map with Hexagon Tiles in Godot.
For a game prototype i wanted to have an overworld map with HexTiles. But not procedural generated but really fixed. So … i searched for tutorials. HexGrid basics and procedural generations are there, but i wanted something else…
I wanted to easily create and change a hexmap in Godot.
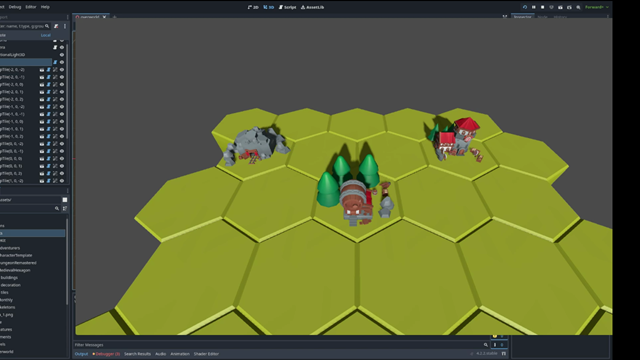
This shows the possible outcome of a generated map in Godot.
What will be covered in this tutorial:
– How to import the free resources i used
– Problems with HexMaps
– Positioning of HexTiles on a map with simple coords
– Generating a Map in a Square Size
– Change the Map Size
– Having MapTiles that you can change
– Getting Collisionshapes out of the used models
Import free resources
I used the sources of a really cool artist: Kay Lousberg. He recently published his “Medieval Hexagon Pack” on itch and it has a really big and cool free part…
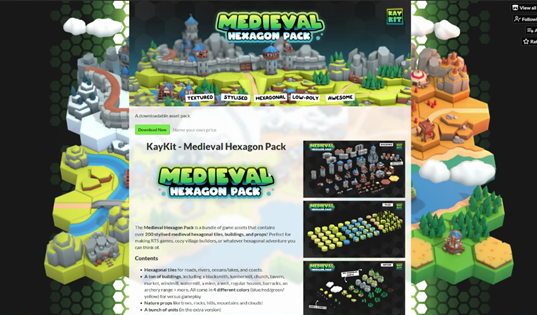
You can just use the free set to follow this or give him some money for his great work and please look at his other assets as well.
After you downloaded and extracted the zip file you need to go into the assets folder and for godot we need the content of the gtlf folder wich contains all the models of the kit to use with godot.
Now open Godot with your project or create a new one for this tutorial.
I created a folder “Assets” inside my project and pulled the subfolders of the gtlf folder into it.
Small note: you need to select the folder you want to drag somethin into in godot first so it is highlighted, because godot will import into the hightlighted folder
After importing the files we are ready to start.
Problems with HexMaps
Using HexMaps is cool i really like them, but positioning them by hand is really time comsuming. You need to position every single tile and then never touch the coords again.
I just lost my drive trying to align 10 HexTiles and my idea was to have a base map of 10×10.
Positioning of HexTiles on a map with simple coords
So the first thing we need is something that positions the hextiles for us. It needs to be done in the editor and not only when running the game and not randomly, since the outcome we are aiming for in this tutorial is a static map that we can easily edit in the editor.
I want to use simple 2D coords for the map. (0/0) being in the 0/0/0 position of the map.
Small note: Godot 2D coords (x/y) are simple but the 3D coords (x/y/z) shift since the y in the 3D space is the “up/down” coord… so we need to always transfer the second (y) coord of our tile to the third (z) value of the position of the tile in the 3D space
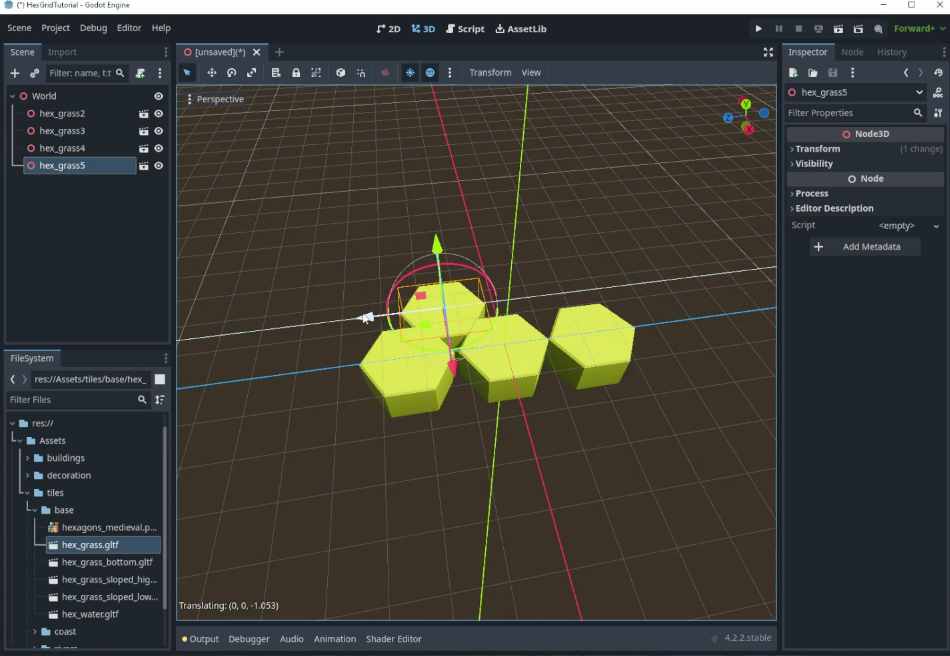
So first of all we need to create a 3D Scene in our game. I named it “World” and inside that add another Node3D and name it “MapTile” and drag the “hex_grass.gltf” from the “Assets->tiles->base” under the “MapTile” you just added.
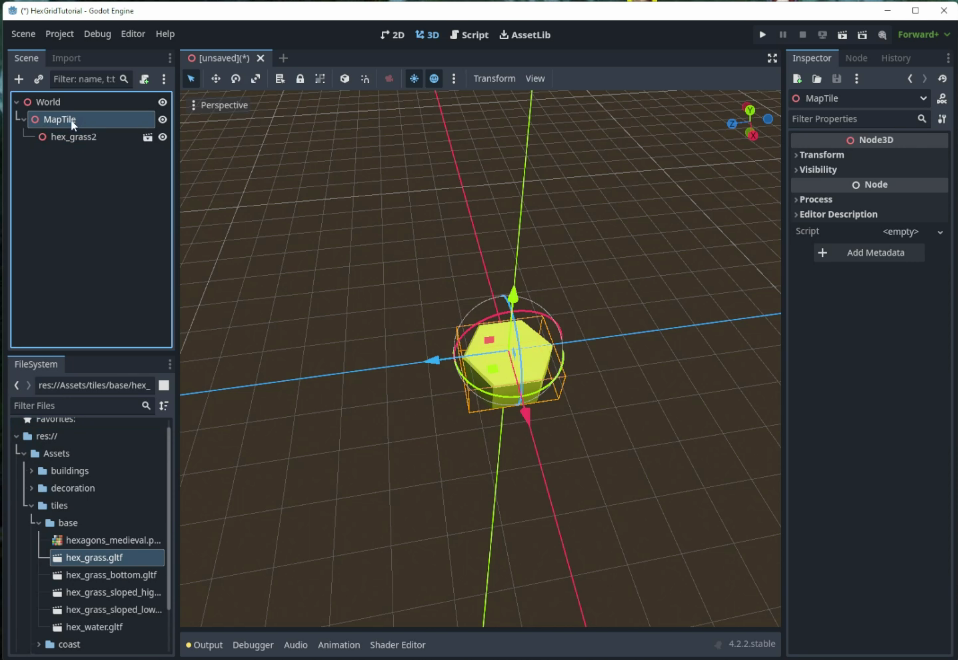
Since we will need this as a loadable element and add some more stuff to it later, let’s save this as it’s own scene. Do do this right-click on the “MapTile” and select “Save Branch as Scene…”.
I created a folder under the project root named “Tiles” to save all my tiles stuff under.
Open the newly created scene and add a script to it.
First of all we add 2 consts that define the dimensions of our tile:
const TILE_WIDTH:int = 2
const TILE_HEIGHT:int = 1
The width defines the distance from the flat to the flat on the surface,
the height the y-height of the tile (so we may change the tile positioning on the y axis later)
Than we need the varable for the coords. It should be an @export var so it can be manipulated in the editor later. But first of all we need to talk about another notation to be used in this script and this is @tool.
Small note: @tool notation on top of a script will let it execute code inside the editor.
So the script should now look like this. Combining the @tool notation and the setter of a value you can create code that is executed in the editor when you change a variable.
@tool
extends Node3D

const TILE_WIDTH:int = 2
const TILE_HEIGHT:int = 1

@export var coords:Vector3i:
	set(value):
		coords = value
		var modifier = 0 if coords.z % 2 == 0 else TILE_WIDTH / 2
		position.x = coords.x * TILE_WIDTH + modifier
		position.y = coords.y * TILE_HEIGHT
		position.z = coords.z * TILE_WIDTH * cos(deg_to_rad(30))
I won’t explain the calculations i depth. If you are interested in the calculations please what one of the tutorials you can find about hexgrid generation.
– The modifier in this code checks if the tile is on an even or odd row and moves it accordingly to fit into the space it should occupy
– The z-coord is calculated with the tile-width and the cosinus to get the correct positioning.
When you now hop to the 2D view and change the coords… nothing happens… this is because Godot didn’t register the @tool notation yet. To fix this close the “MapTile” Scene and reopen it. Now changing the coords values should change the positioning of the MapTile in the editor.
First step done!
Generating a Map in a Square Size
Ok, now we are able to add a tile and just change the coords so it is in the right position, now it would be cool if godot would do the positioning for us.
For this we open the “World” scene and add another “Node 3D” to it and call it “Map”. This map should work for us, so we add a script to it (i just saved it under the main root, like the world node as well)
The map-script needs to be a tool script too and it needs to know where it can find our MapTile it should position on the map, as well as the size the map should be. Since we will only generate the map in two dimensions we only need a Vector2D for this variable.
I will also add a preloading of the map_tile so the script knows it and we can instaitate it easily as well as a dictionary that will help access the tiles we generate later.
@tool
extends Node3D

@onready var map_tile_prefab = preload("res://Tiles/map_tile.tscn")

@export var map_tiles:Dictionary
@export var map_size: Vector2i = Vector2i(2,2)
Small note: i’m using Vector2i for this since the map size can only have integer values since the map cannot be 2,5 tiles wide with this script
Now we need a method to trigger our map generation in the editor. Since it is not possible to add buttons in the editor inspector without writing a bigger tool we fake one with a checkbox.
@export var generate_the_map:bool:
	set(value):
		if value == true:
			generate_map()
			generate_the_map = false
with this the funciton “generate_map()” will be triggered everytime we click on the checkbox. Since we only need it to trigger the function, we never set the value to true.
Now we need the generate map function but we need to check if the map can be generated at all.
func generate_map():
	if map_size == Vector2i.ZERO || map_size.x == 0 || map_size.y == 0:
		printerr("MapSize or one of its values is Zero!, cannot generate Map")
		return

	var start = Vector2i.ZERO
	for x in map_size.x:
		for z in map_size.y:
			var new_pos = Vector3i(start.x+x, 0, start.y+z)
			add_tile(new_pos)

func add_tile(new_pos):
	var scene = get_tree().get_edited_scene_root()
	var new_tile = map_tile_prefab.instantiate()
	add_child(new_tile)
	new_tile.set_owner(scene)
	new_tile.name = "MapTile"+str(new_pos)
	new_tile.coords = new_pos
	map_tiles[new_tile.coords] = new_tile
Site note: Remember that we set the start.y coord to the z part of the coord of the tile since the y-axis-vaue of the start (Vector2i) needs to be put in the z-axis-value of the tile-coord (Vector3i)
I positioned the actual adding of the tile in a separate function so we can reuse it later. For better identification i also name the Tiles with “MapTile” and the given coords.
The scene and the set_owner are needed so the Tiles you add via code are shown in the Scene tree and therefor be saved when you save the map. Otherwise these would be lost when closing and saving the scene (wich would be really annoying)
Generation starts at 0/0 and moves on, thats cool but maybe we want the 0/0 to be the center, so we can add a “start_at_zero” variable that we wil use when generating the map.
Just add
@export var start_at_zero:bool = trueat the top where the other variables are created and change the generate_map-Function by adding
if !start_at_zero: start -= map_size/2after the initalising the start variable.
Now up to the next problem:
When you recreate your map… it creates it on top of the old tiles. So, either we need to delete them ourselfs (boooo), or we need something to clear the map (yeaaahhh). Then let’s add another checkbox to trigger a function:
@export_category("DELETE")
@export var clear_the_map:bool:
	set(value):
		if value == true:
			clear_map()
			clear_the_map = false
and the clear_map function
func clear_map():
	for c in get_children():
		c.queue_free()
wich is really simple it only removes the children of the map node… wooosh…
I added “@export_category(“DELETE”)” on top of the new export-variable so it will have it’s own section inside the inspector and you are less prone to click on it and erase your map.
Let’s change the MapTile by adding some debug-informations like the coords
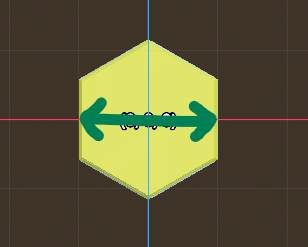
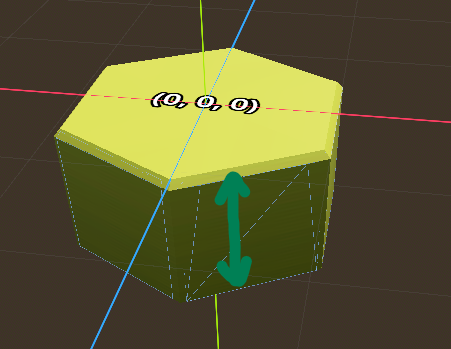
Open or focus the “MapTile” scene and add a Label3D Node to the root of the scene and name it “DebugText” and set visible to false.
Change the Transform settings to this, so it is positioned slightly above the tile facing up:
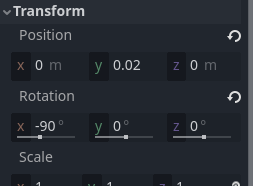
I chose the following settings:
Add a variable to your MapTile script and a function to handle the display of it
@export var show_debug_text:bool:
set(value):
show_debug_text = value
if Engine.is_editor_hint(): show_debug()
func show_debug():
var debug_text = get_node_or_null("DebugText")
if debug_text == null: return
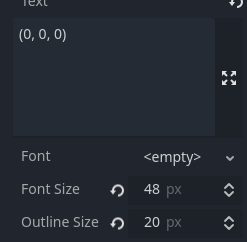
$DebugText.text = str(coords)
$DebugText.visible = show_debug_textthe first two lines of the show_debug functions are for save fail only. Since it may be that the debug text it not there or not loaded so in this case the function simply returns and does nothing
The “Engine.is_editor_hint()” is a function you can use when you want to check if the code is run in the editor or not. In this case it only should run in the editor.
So changing this variable in the editor inspector should change the visibility of the debug text and set it to the correct value of the coords. To have the value change when you change the coords simply add the following line to the setter of the coords
if Engine.is_editor_hint(): show_debug()Ok MapTile done for now, change back to the world scene and open the map script again since we want to be able to trigger the debug text in the map itself and not for every single map tile
We add a variable to the script, naming it like the one in the tile
@export var show_debug_text:bool = false:
	set(value):
		show_debug_text = value
		show_debug()
and the show_debug function
func show_debug():
	for t in get_children():
		t.show_debug_text = show_debug_text
wich is quite straight forward
Change the Map Size
Right now we can only replace a map but not change it’s size and keep the old one. But when we start placing stuff on top of different tiles we would want to keep the already existent tiles when changing the size.
For this we split up the generation of the map and change the “generate_map” function
func generate_map():
	if map_size == Vector2i.ZERO || map_size.x == 0 || map_size.y == 0:
		printerr("MapSize or one of its values is Zero!, cannot generate Map")
		return
	if get_child_count() == 0:
		generate_clear_map()
	else:
		generate_changed_map()
The old map generation gets it’s own function
func generate_clear_map():
	var start = Vector2i.ZERO
	if !start_at_zero: start -= map_size/2
	for x in map_size.x:
		for z in map_size.y:
			var new_pos = Vector3i(start.x+x, 0, start.y+z)
			add_tile(new_pos)
Site note: Remember that we set the start.y coord to the z part of the coord of the tile since the y-axis-vaue of the start (Vector2i) needs to be put in the z-axis-value of the tile-coord (Vector3i)
For the new function we need to get the following stuff worked through:
– if the map size is smaller: remove the “overhang”
– if the map size is greater: add new tiles
func generate_changed_map():
	var start = Vector2i.ZERO
	if !start_at_zero: start -= map_size/2
	##remove tiles not in map anymore
	for tile_pos in map_tiles.keys():
		var test = Vector3i(start.x-map_size.x-1,0,start.y+map_size.y-1)
		if tile_pos.x > test.x || tile_pos.z > test.z: remove_tile(tile_pos)
		elif tile_pos.x < start.x || tile_pos.z < start.y: remove_tile(tile_pos)
	##add new tiles
	for x in map_size.x:
		for z in map_size.y:
			var current_pos = Vector3i(start.x+x, 0, start.y+z)
			if !map_tiles.has(current_pos):
				add_tile(current_pos)

func remove_tile(tile_pos):
	if map_tiles.has(tile_pos):
		var to_remove = map_tiles[tile_pos]
		map_tiles.erase(tile_pos)
		to_remove.get_parent().remove_child(to_remove)
Site note: the removing of the tiles seams a bit warped but we want to be sure that the tile isn’t in the map_tile dictionary anymore and is not referenced by anything. The weird way of using the geet_parent().remove_child() function called by the child itself seems to do the trick
So we remove every tile that as an x or y coord value below the new starting point (only happening when you have start_at_zero = false) or the x or y coord are higher that the starting point plus the map-size minus one.
To add new tiles the code simply checks if a tile exists for every coord the new map size will produce.
With that we can change the size and all the tiles inside the new map_size remain untouched by the change.
Update 20.05.2024 (found a problem with loading the map)
To be able to use the generation with changed maps after freshly loading the Map in the editor we need to help the script load the dictionary of the tiles correctly. So we add a new function that recreates the map_tiles dictionary
func check_map_tiles_dict():
	map_tiles = {}
	for c in get_children():
		map_tiles[c.coords] = c
Then call this function on top of the “generate_changed_map” function and you should be save
Having MapTiles that you can change
Alright… the map is being created and now it would be really cool if we could just change the tiles by clicking on them.
Just clicking on a tile and having a range of tiles to choose from would be cool, wouldn’t it?
To create this, we need to change our MapTile a bit. For this we remove the “hex_gras” from our MapTile Scene and add a new Node3D and name it HexTile. This will be our container for the actual visual Tile we want to select.
Add another Node3D this “HexTile” Node and name it “GrassTile”, all other Tiles will be inherited from this one. Drag and drop the hex_grass from our Assets/tiles/base folder into the “GrassTile” Node and create a new Scene out of this (right click on the “GrassTile” node and select “Save Branch as Scene”. Save it into the same folder you saved the HexTile Scene into.
Please check that the hex_grass is at the 0/0/0 position just to be sure.
For other Tile Types you can either follow the same way and maybe add Houses on Top of the grass tile or you create inherited scenes where you keep the stuff of the parent scene and just add stuff on top.
For this tutorial i created a grass-tile and a water-tile just to show how my idea works.
Now you go to the MapTile scene and remove the node or nodes that are children of the MapTile Scene

To be able to change the tiles with the variable we need to preload all the options
@onready var preloads:Dictionary = {
"grass": load("res://Tiles/grass_tile.tscn"),
"water": load("res://Tiles/water_tile.tscn")
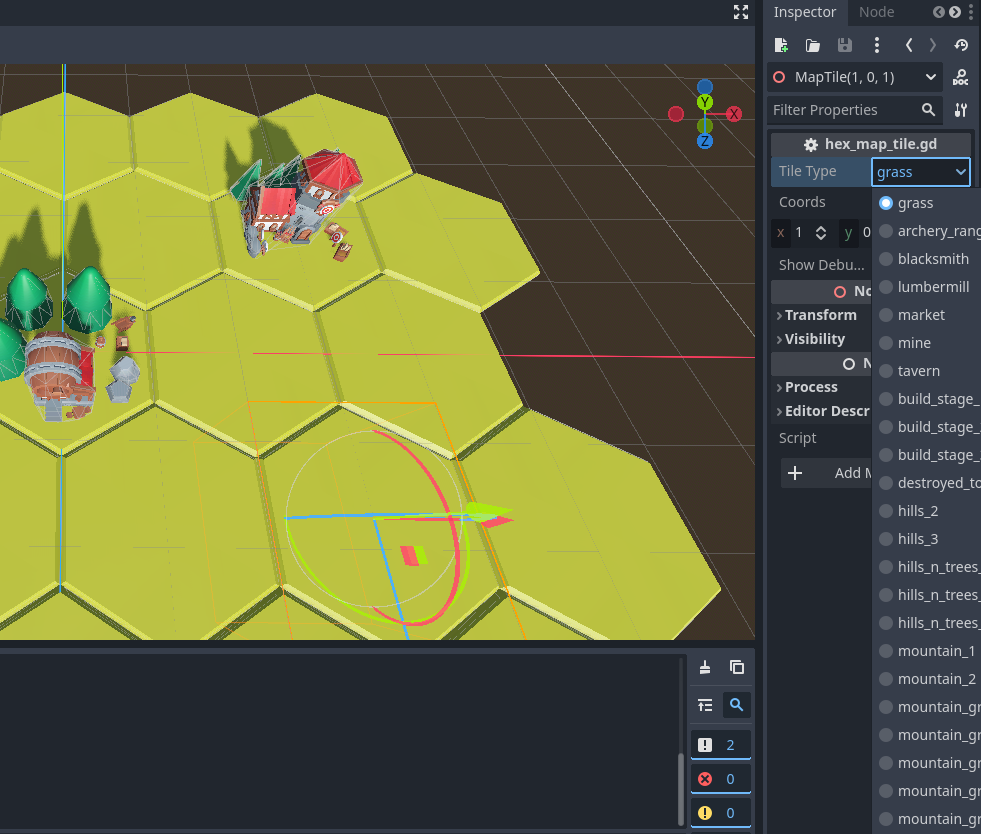
}Then we need the select box to select the tiletypes. For this we use the @export_enum annotation wich i really like for stuff like this
@export_enum("grass","water") var tile_type:String = "grass":
	set(value):
		tile_type = value
		init_hex_tile()
For this to work in the editor we use a setter, again 😉
The called init_hex_tile function wich simply sets the hex_tile that should be used by the map_tile
func init_hex_tile():
	if tile_type in preloads:
		used_tile = preloads[tile_type].instantiate()
This triggers the setter of another variable wich stores the instatiated tile we want to display.
var used_tile:
	set(value):
		used_tile = value
		if Engine.is_editor_hint(): set_hex_tile()
In editor we now want to actually set the hex tile. When the game is running this will be handled by the _ready function
func set_hex_tile():
	clear_hex_tile()
	var hex_tile = get_node_or_null("HexTile")
	if hex_tile == null: return
	$HexTile.add_child(used_tile)
	used_tile.set_owner(self)

func clear_hex_tile():
	var hex_tile = get_node_or_null("HexTile")
	if hex_tile != null:
		for c in hex_tile.get_children():
			c.queue_free()
These two functions take care of loading the tiletype you want to have on your tile. First the HexTile container is cleared and then the wanted hexTile is loaded into the HexTile container.
Small note: reminder: you need to set the owner so the code-added-node appears in the scene tree in the editor
For ingame-functionality just add the _ready function
func _ready():
	if !Engine.is_editor_hint(): show_debug()
	init_hex_tile()
	if !Engine.is_editor_hint(): set_hex_tile()
You may need to close and reopen the MapTile Scene to get this working in the editor
Getting Collisionshapes out of the used models
Last thing you may want to add is a StaticBody3D to your MapTile so you can get click-actions or other collision stuff on your tiles.
So add a StaticBody3D Node to your MapTile
The cool thing is you can geht the collisionshapes out of the data you have in your hex tiles
Change the set_hex_tile and clear_hex_tile functions like this:
func set_hex_tile():
	clear_hex_tile()
	var hex_tile = get_node_or_null("HexTile")
	if hex_tile == null: return
	$HexTile.add_child(used_tile)
	used_tile.set_owner(self)
	for c in used_tile.get_children():
		for m in c.get_children():
			if m is MeshInstance3D:
				var polygon = m.mesh.create_convex_shape(true, true)
				var shape = CollisionShape3D.new()
				shape.shape = polygon
				$StaticBody3D.add_child(shape)
				shape.position = c.position
				shape.scale = c.scale
				shape.set_owner(self)

func clear_hex_tile():
	var hex_tile = get_node_or_null("HexTile")
	if hex_tile != null:
		for c in hex_tile.get_children():
			c.queue_free()
	var static_body = get_node_or_null("StaticBody3D")
	if static_body != null:
		for c in $StaticBody3D.get_children():
			c.queue_free()
This extracts the shapes out of the MeshInstance3D and the inlaid Meshes and creates polygons out of it wich can use as shapes for CollisionShape3D nodes… wich you then add to your $StaticBody3D.
And thats it for this Tutorial… hope you enjoyed it. If you have questions, just join the Sehoni Island Discord … you can find the link in the footer right below.